
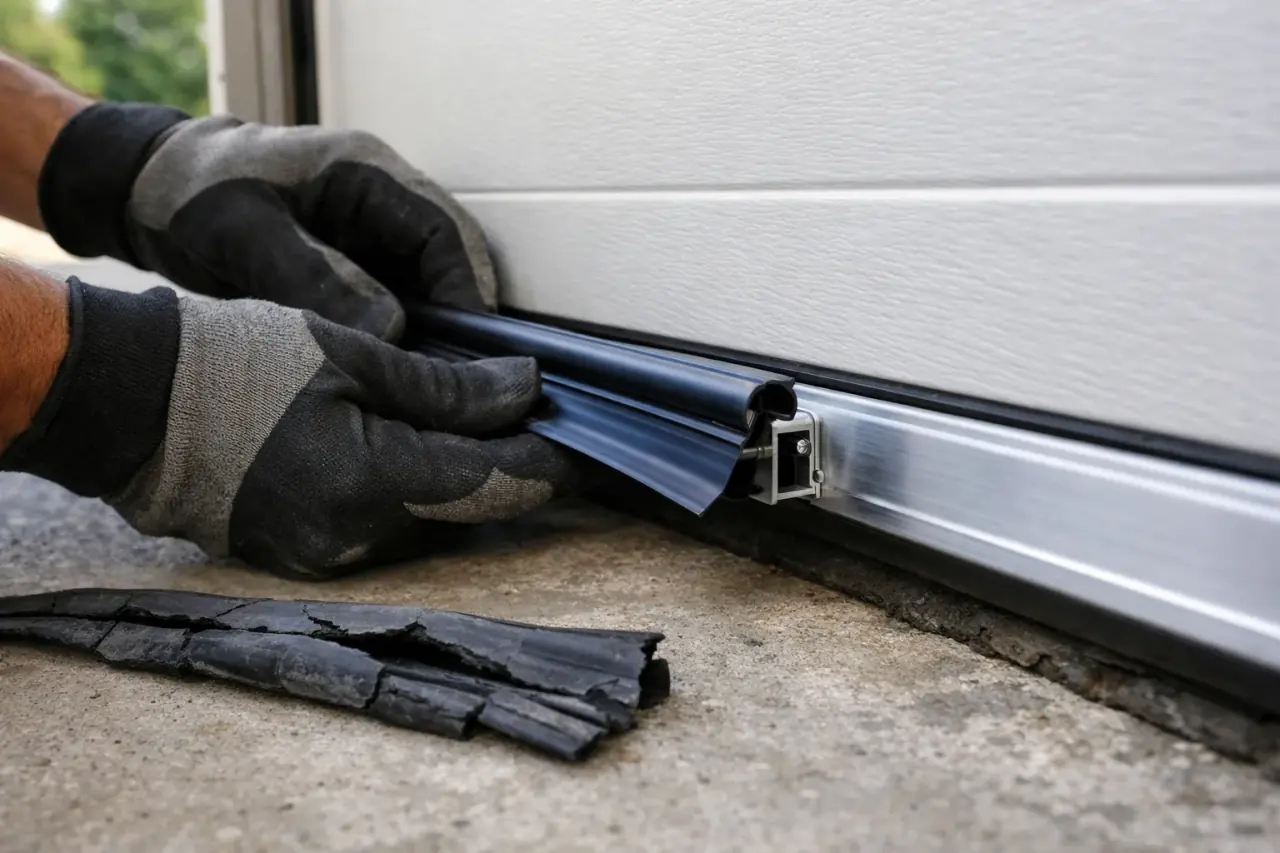
What are the different types of garage door weather stripping?
"Weather stripping" covers several separate seals, and each one blocks a different gap:
- Bottom seal (astragal): the rubber or vinyl strip along the bottom edge of the door that meets the floor. It's the seal that wears out first.
- Bottom retainer: the aluminum or steel channel, screwed to the bottom of most steel doors, that holds the bottom seal.
- Stop molding (jamb seal): the strips fastened to the side jambs and header with a flexible flap that presses against the face of the closed door.
- Threshold seal: an optional raised rubber strip glued to the floor that the door closes against.
- Section joint seals: seals built into the joints between sections on many insulated doors. These are part of the door and usually not replaced separately.
How do you know your weather stripping needs replacing?
With the door closed, turn off the garage lights during the day and look around the edges. Replace seals when you see:
- Daylight under the door or along the sides and top
- Water on the floor inside the door after rain
- Leaves, dirt or insects collecting just inside the door
- A rubber edge along the bottom that has gone hard, split, torn or stayed squashed flat
- A stop molding flap that has curled away from the door or split
- Drafts you can feel along the edges on a windy day
Which bottom seal fits your door?
The bottom seal has to match the retainer it slides into, so identify the retainer before you shop:
- T-style seals: The most common on steel doors. The seal has a "T" shaped bead on each edge that slides into two slots in the retainer. The beads come in slightly different thicknesses (commonly 1/4 inch and 5/16 inch), so measure.
- Bulb seals: A round, hollow seal with T-ends, which compresses more and handles small floor dips.
- J-type and beaded seals: Used on certain manufacturers' retainers with a different slot shape.
- Nail-on or screw-on flaps: Common on wood doors with no retainer. The seal is an L-shaped or flat rubber or vinyl strip fastened directly to the bottom edge.
To match it:
- Look at the end of the door to see the retainer's profile.
- Measure the width of the old seal laid flat.
- Note the door's brand if it's printed on a label inside the door.
- Cut off a small piece of the old seal and bring it to the supplier.
If the retainer itself is bent, corroded or missing pieces, the seal won't stay in. Replacement retainers exist for most doors, but on many steel doors the ends of the retainer sit right next to the bottom brackets that anchor the lift cables. That's where the job stops being a simple DIY project.
How do you replace a garage door bottom seal?
You'll need a helper, a new seal a few inches longer than the door, a utility knife, pliers, soapy water or silicone spray, and two C-clamps or locking pliers.
Safety warning: Never loosen or remove the steel brackets at each bottom corner where the lift cables anchor. Those brackets carry full spring tension; releasing one can send the bracket or cable flying and drop the door. If the seal or retainer can't be replaced without removing those brackets, stop and call a technician.
- Open the door partway. Raise it to about chest height so you can reach the bottom edge and slide the seal out from one end.
- Lock it in place. Unplug the opener, then clamp C-clamps or locking pliers onto both vertical tracks just below a roller so the door can't move down.
- Remove the old seal. Some retainer ends are crimped closed; pry them open gently with pliers. Pull the old seal out from one end.
- Clean the channels. Wipe out dirt and grit, then spray the slots with silicone or wipe them with soapy water so the new seal slides.
- Feed the new seal. One person feeds the T-ends into both slots at once while the other pulls from the far end. Work slowly to avoid kinking the seal.
- Center and trim. Cut the seal so a little extra sticks out past each end of the door (many seal makers suggest about an inch), because rubber and vinyl can shrink slightly over time.
- Close the retainer ends. Lightly crimp them or fold the seal end under, according to the seal manufacturer's instructions.
- Remove the clamps and test. Plug the opener back in, close the door and check that the seal touches the floor along its full width.
A new seal is often thicker than the worn one it replaces, so the door may now stop slightly early or press too hard. Adjust the opener's close (down) travel limit as your manual describes, then run a reversal test against a flat-lying 2x4 to make sure the door backs off the moment it touches. Opener manuals call for that auto-reverse check after any change to the travel limits.
How do you replace the side and top weather stripping?
The stop molding along the jambs and header seals the sides and top. Replacement strips come in PVC with a flexible vinyl flap, or as a vinyl flap you fasten to existing wood stops.
- Close the door. All measuring and fastening is done with the door down.
- Remove the old strips. Pull nails or remove screws, and scrape off old caulk.
- Cut the top piece first. Measure across the header and cut so it overlaps the side pieces' tops neatly.
- Cut the side pieces. Take each jamb measurement from the slab up to where it meets the header strip you just installed.
- Set the flap lightly against the door. Hold each strip so the flexible flap just touches the door face with light compression.
- Fasten every 12 to 18 inches. Use galvanized or stainless nails or screws so they don't rust and streak the trim.
- Run the door. It should open without dragging on the flaps.
Don't set the molding too tight. A flap jammed hard against the door adds friction, can make the opener reverse, and wears quickly. If the door rubs the stops in one spot but not another, the track or door may be out of plumb, one of the early signs a door is leaving its track.
Do you need a threshold seal?
A threshold seal is a raised rubber strip glued to the garage floor. It helps when:
- The slab dips, cracks or slopes so the bottom seal can't reach it everywhere
- Rainwater runs toward the garage from the driveway, a daily event in a Florida wet season
- The bottom seal alone isn't stopping wind-driven rain
Install it on a clean, dry floor using the adhesive the kit specifies, and follow the kit's instructions on where the door should land relative to the raised ridge. Thresholds don't fix large gaps; if the space under the door is more than a small dip, the door, track or floor needs attention first. In snowy areas, Minnesota being the obvious example, keep the threshold clear so meltwater doesn't freeze against it.
How much does garage door weather stripping cost?
As typical U.S. ranges, parts are inexpensive:
- Bottom seal: roughly $20 to $70, depending on door width, material and profile
- Replacement retainer: roughly $40 to $120 for a single- or double-width door
- Stop molding: roughly $30 to $100 for a door's sides and top
- Threshold seal: roughly $30 to $90 including adhesive
Professional seal replacement usually costs a service call plus parts. Price varies by region, door size, seal type and whether a corroded retainer or bottom brackets have to be dealt with. For a broader look, compare typical prices for other door repairs.
Why does good sealing matter beyond drafts?
Seals do more than keep cold air out. A tight bottom seal keeps rain from pooling against the lowest panel and the cable brackets at its corners, where rust usually starts. It also keeps rodents and insects out and stops leaves and dirt from collecting in the tracks.
Good seals also work hand in hand with insulation: an insulated door with gaps around it performs far below its rating. If you're planning both, read how insulation kits and R-values work and seal the edges first.
When is a seal problem really a door problem?
Seals are a homeowner job until the trouble turns out to be the door itself. Hand it to a technician if:
- The retainer or seal can't be replaced without removing the bottom brackets
- The bottom section is bent, rusted through or pulling apart, which raises the question of replacing one panel or the whole door
- The door hangs unevenly, leaving a gap on one side only, which often points to a cable or spring problem
- The door rubs the stops in some places and leaves gaps in others
- The opener reverses or strains after you've changed the seals
Technicians replace seals and retainers as part of our parts replacement visits, check them on every tune-up, and can renew them at the same time when we add insulation to a door. For a quote, tell us about your door or scan the complete service list.
Key takeaways
- The bottom seal, retainer, stop molding and threshold each seal a different gap.
- Match the new bottom seal to your retainer's slot profile and size.
- Lock the door in place before working, and never touch the bottom brackets.
- Set stop molding with light contact, not heavy pressure.
- Readjust the close limit if needed and retest auto-reverse after replacing the bottom seal.